Creating New Custom Styles
To create new custom styles, first style a piece of text as you want, then click on Custom Styles >
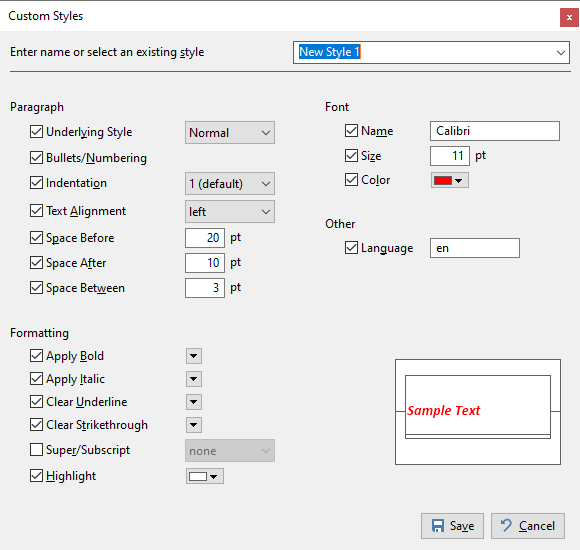
Save Selection as Custom Style, which will display the following dialog:

This dialog allows you to give your custom style a name. You can also select a style you previously created and overwrite
using the drop down. Second, the dialog shows all the applied style information on the selection and you get to choose
which ones you want in the custom style. For instance in this case the selection had bold/italic, left aligned,
Calibri 11 red etc. If you only want the style definition to be: Apply bold and italic, and not about the font,
color etc. you can deselect all but the Apply Bold and Apply Italic. As you do so, you will see that the preview
is updated. For example if you deselect Color (red), then the preview text will turn black.
You can also modify any of these properties in this dialog. For instance you can change the color by clicking on the
color button and selecting a new color.
Once you are satisfied with your style definition, you can click
and the new style will be added to the gallery, with the same preview you have seen in the dialog.
If your question isn't answered, send an e-mail to
support@getonetastic.com.