Import & Export Custom Styles
Use Import / Export to move or back up your custom styles. Exported styles are added to your Custom Styles list after import so they are available for use.
Export custom styles
- Open Onetastic Options (Home ribbon > Tools and Settings) and go to the Import / Export tab.
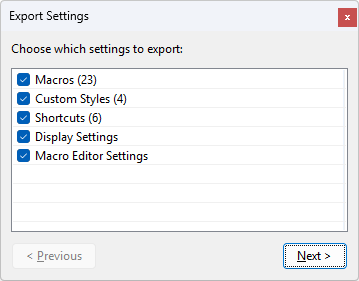
- Click Export Settings and check Custom Styles (plus any other categories you want).
- Choose a filename and save the .xml file to a safe location (cloud, USB, etc.). Consider including a date in the filename (for example
onetastic-styles-2026-09-04.xml).
Import custom styles
- On the target computer open Import / Export > Import Settings and select the exported .xml file.
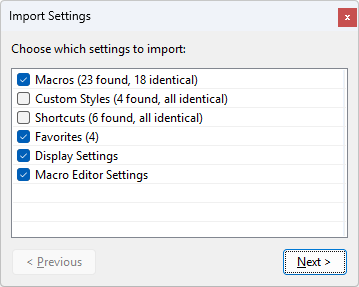
- The import preview shows how many styles are present and whether they are identical to existing ones. If some styles are identical, Onetastic will automatically uncheck that section to avoid importing unchanged items.
- If there are conflicting styles, Onetastic presents a conflict page where each item can be checked to overwrite or unchecked to keep the local version.
- Proceed to import and review the summary, which shows counts of imported, skipped (identical), and unchecked items.
Notes and tips
- Import / Export requires an Onetastic Pro license; the options dialog shows an upgrade link if it is not available.
- Imported styles are added to your Custom Styles list for future use; importing styles does not automatically modify existing pages unless you explicitly apply those styles.
- Keep dated backups and store copies in both cloud storage and an external drive for redundancy.
Using Import / Export is safer and more flexible than copying style files manually. The conflict and summary pages help ensure you only change what you intend.
If your question isn't answered, send an e-mail to
support@getonetastic.com.